Quick Start
This page gives a quick introduction to the Flask-Admin library. It is assumed that the reader has some prior knowledge of the Flask framework.
If you’re a Django user, you might also find the Migrating from Django guide helpful.
Introduction
The library is intended to be as flexible as possible. And the developer should not need to monkey-patch anything to achieve desired functionality.
The library uses one simple, but powerful concept - administrative pieces are built as classes with view methods.
For example, here is an absolutely valid administrative piece:
class MyView(BaseView):
    @expose('/')
    def index(self):
        return self.render('admin/myindex.html')

    @expose('/test/')
    def test(self):
        return self.render('admin/test.html')
If the user visits the index view, the admin/myindex.html template will be rendered. In the same way, visiting the test view will result in the admin/test.html view being rendered.
So, how does this approach help in structuring an admin interface? With such building blocks, you’re implementing reusable functional pieces that are highly customizable.
For example, Flask-Admin provides a ready-to-use SQLAlchemy model interface. It is implemented as a class which accepts two parameters: the model class and a database session. While it exposes some class-level variables which change behavior of the interface (somewhat similar to django.contrib.admin), nothing prohibits you from inheriting from it and overriding the form creation logic, database access methods or extend existing functionality by adding more views.
Initialization
To start using Flask-Admin, you have to create a Admin class instance and associate it
with the Flask
application instance:
from flask import Flask
from flask.ext.admin import Admin

app = Flask(__name__)

admin = Admin(app)
# Add administrative views here

app.run()
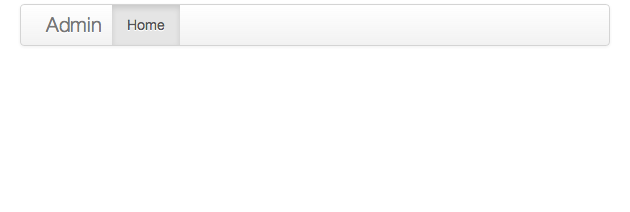
If you start this application and navigate to http://localhost:5000/admin/, you should see an empty “Home” page with a navigation bar on top
You can change the application name by passing a value for the name parameter to the
Admin class constructor:
admin = Admin(app, name='My App')
As an alternative to passing a Flask application object to the Admin constructor, you can also call the
init_app() function, after the Admin instance has been initialized:
admin = Admin(name='My App')
# Add views here
admin.init_app(app)
Adding views
Now, lets add an administrative view. The next example will result in two items appearing in the navbar menu: Home
and Hello. To do this, you need to derive from the BaseView class:
from flask import Flask
from flask.ext.admin import Admin, BaseView, expose

class MyView(BaseView):
    @expose('/')
    def index(self):
        return self.render('index.html')

app = Flask(__name__)

admin = Admin(app)
admin.add_view(MyView(name='Hello'))

app.run()
One important restriction on admin views is that each view class should have a default page-view method with a root url, ‘/’. The following example is correct:
class MyView(BaseView):
    @expose('/')
    def index(self):
        return self.render('index.html')
but, this wouldn’t work:
class MyView(BaseView):
    @expose('/index/')
    def index(self):
        return self.render('index.html')
Now, create a new index.html file with following content:
{% extends 'admin/master.html' %}
{% block body %}
    Hello World from MyView!
{% endblock %}
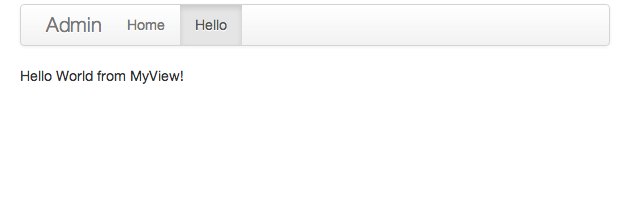
and place it in a templates directory. To maintain a consistent look and feel, all administrative pages should extend the admin/master.html template.
You should now see your new admin page in action on the Hello page
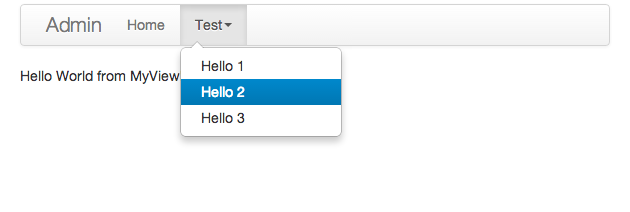
To add another level of menu items, you can specify a value for the category parameter when passing admin views to the Admin instance. The category specifies the name of the top-level menu item, and all of the views that are associated with it, will be accessible from a drop-down menu. For example:
from flask import Flask
from flask.ext.admin import Admin, BaseView, expose

class MyView(BaseView):
    @expose('/')
    def index(self):
        return self.render('index.html')

app = Flask(__name__)

admin = Admin(app)
admin.add_view(MyView(name='Hello 1', endpoint='test1', category='Test'))
admin.add_view(MyView(name='Hello 2', endpoint='test2', category='Test'))
admin.add_view(MyView(name='Hello 3', endpoint='test3', category='Test'))
app.run()
will look like
Authentication
Flask-Admin does not make any assumptions about the authentication system you might be using. So, by default, the admin interface is completely open.
To control access to the admin interface, you can specify an is_accessible method when extending the BaseView class. So, for example, if you are using Flask-Login for authentication, the following will ensure that only logged-in users have access to the view in question:
class MyView(BaseView):
    def is_accessible(self):
        return login.current_user.is_authenticated()
To redirect the user to another page if authentication fails, you will need to specify an _handle_view method:
class MyView(BaseView):
    def is_accessible(self):
        return login.current_user.is_authenticated()

    def _handle_view(self, name, **kwargs):
        if not self.is_accessible():
            return redirect(url_for('login', next=request.url))
You can also implement policy-based security, conditionally allowing or disallowing access to parts of the administrative interface. If a user does not have access to a particular view, the menu item won’t be visible.
Model Views
Model views allow you to add dedicated admin pages for each of the models in your database. Do this by creating instances of the ModelView class, which you can import from one of Flask-Admin’s built-in ORM backends. An example is the SQLAlchemy backend, which you can use as follows:
from flask.ext.admin.contrib.sqla import ModelView
# Flask and Flask-SQLAlchemy initialization here
admin = Admin(app)
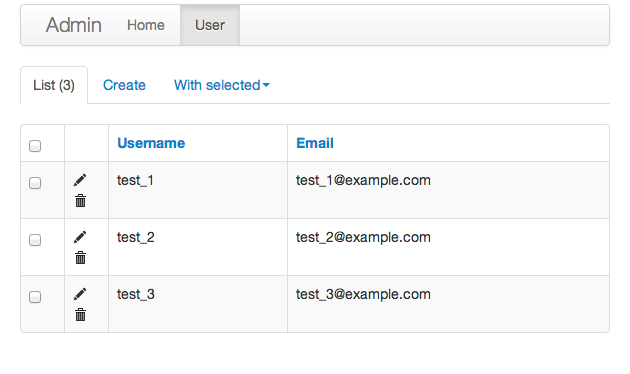
admin.add_view(ModelView(User, db.session))
This creates an admin page for the User model. By default, the list view looks like
To customize these model views, you have two options: Either you can override the public properties of the ModelView class, or you can override its methods.
For example, if you want to disable model creation and only show certain columns in the list view, you can do something like:
from flask.ext.admin.contrib.sqla import ModelView

# Flask and Flask-SQLAlchemy initialization here

class MyView(ModelView):
    # Disable model creation
    can_create = False

    # Override displayed fields
    column_list = ('login', 'email')

    def __init__(self, session, **kwargs):
        # You can pass name and other parameters if you want to
        super(MyView, self).__init__(User, session, **kwargs)

admin = Admin(app)
admin.add_view(MyView(db.session))
Overriding form elements can be a bit trickier, but it is still possible. Here’s an example of how to set up a form that includes a column named status that allows only predefined values and therefore should use a SelectField:
from wtforms.fields import SelectField

class MyView(ModelView):
    form_overrides = dict(status=SelectField)
    form_args = dict(
        # Pass the choices to the `SelectField`
        status=dict(
            choices=[(0, 'waiting'), (1, 'in_progress'), (2, 'finished')]
        ))
It is relatively easy to add support for different database backends (Mongo, etc) by inheriting from
BaseModelView.
class and implementing database-related methods.
Please refer to flask.ext.admin.contrib.sqla documentation on how to customize the behavior of model-based
administrative views.
File Admin
Flask-Admin comes with another handy battery - file admin. It gives you the ability to manage files on your server (upload, delete, rename, etc).
Here is simple example:
from flask.ext.admin.contrib.fileadmin import FileAdmin

import os.path as op

# Flask setup here

admin = Admin(app)

path = op.join(op.dirname(__file__), 'static')
admin.add_view(FileAdmin(path, '/static/', name='Static Files'))
Sample screenshot:
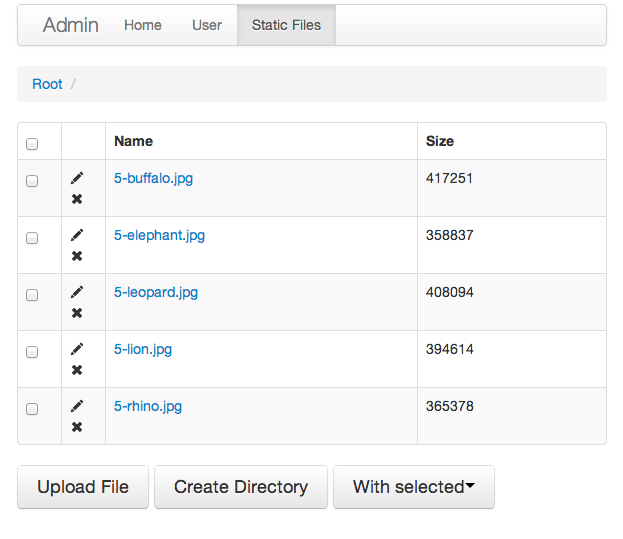
You can disable uploads, disable file or directory deletion, restrict file uploads to certain types and so on.
Check flask.ext.admin.contrib.fileadmin documentation on how to do it.
Generating URLs
Internally, view classes work on top of Flask blueprints, so you can use url_for with a dot prefix to get the URL for a local view:
from flask import url_for

class MyView(BaseView):
    @expose('/')
    def index(self)
        # Get URL for the test view method
        url = url_for('.test')
        return self.render('index.html', url=url)

    @expose('/test/')
    def test(self):
        return self.render('test.html')
If you want to generate a URL for a particular view method from outside, the following rules apply:
You can override the endpoint name by passing endpoint parameter to the view class constructor:
admin = Admin(app)
admin.add_view(MyView(endpoint='testadmin'))

In this case, you can generate links by concatenating the view method name with an endpoint::

url_for('testadmin.index')
If you don’t override the endpoint name, the lower-case class name can be used for generating URLs, like in:
url_for('myview.index')
For model-based views the rules differ - the model class name should be used if an endpoint name is not provided. The ModelView also has these endpoints by default: .index_view, .create_view, and .edit_view. So, the following urls can be generated for a model named “User”:
# List View
url_for('user.index_view')

# Create View (redirect back to index_view)
url_for('user.create_view', url=url_for('user.index_view'))

# Edit View for record #1 (redirect back to index_view)
url_for('user.edit_view', id=1, url=url_for('user.index_view'))
Examples
Flask-Admin comes with several examples, that will really help you get a grip on what’s possible. Browse through them in the GitHub repo, and then run them locally to get yourself up to speed in no time:
- Simple views
Here we show how to add some simple custom views to your admin interface. They don’t have to be associated to any of your database models. You can fill them with whatever content you want.
- Custom layout
Override some of the built-in templates to get complete control over the look and feel of your Admin interface. Either while using the default Bootstrap 2, or the newer Bootstrap 3.
- SQLAlchemy model example
Model-based views provide heaps of builtin goodness, making it really easy to get a set of the default CRUD views in place. This example shows some of the basics.
- SQLAlchemy model views with custom forms and file handling
Here, we show some of the more interesting things you can do with very little effort, including customizing the builtin forms, and adding support for handling file/image uploads.
- Flask-Login integration example
Use Flask-Login for authentication to hide some of your admin views behind a login wall.
- Peewee model example
Not so keen on SQLAlchemy? Perhaps you’d rather use Peewee?
- MongoEngine model example
... or check this example if MongoDB is more your style.
- I18n and L10n with Flask-BabelEx
Do you need to make your Admin interface available in other languages? Luckily, Flask-Admin is built for just that kind of thing.
- Redis terminal
If you use Redis for caching, then check this example to see how easy it is to add a Redis terminal to your Admin interface, so you can reach your Redis instance straight from a browser.